开平衡车的人都会走残疾人通道。| 做人要谦逊。
从学校考完试回来,掐指一算已经有一个月没写过代码了。今天下午见到某工程师,相比之下感觉现在的自己是个sb。
正题:在mac上配置远程开发环境
> 事出有因,在公司工程机上的开发环境是ubuntu16.04,现在要统统挪到本宝宝的mac上。
远程桌面环境。
连windows 直接安装应用
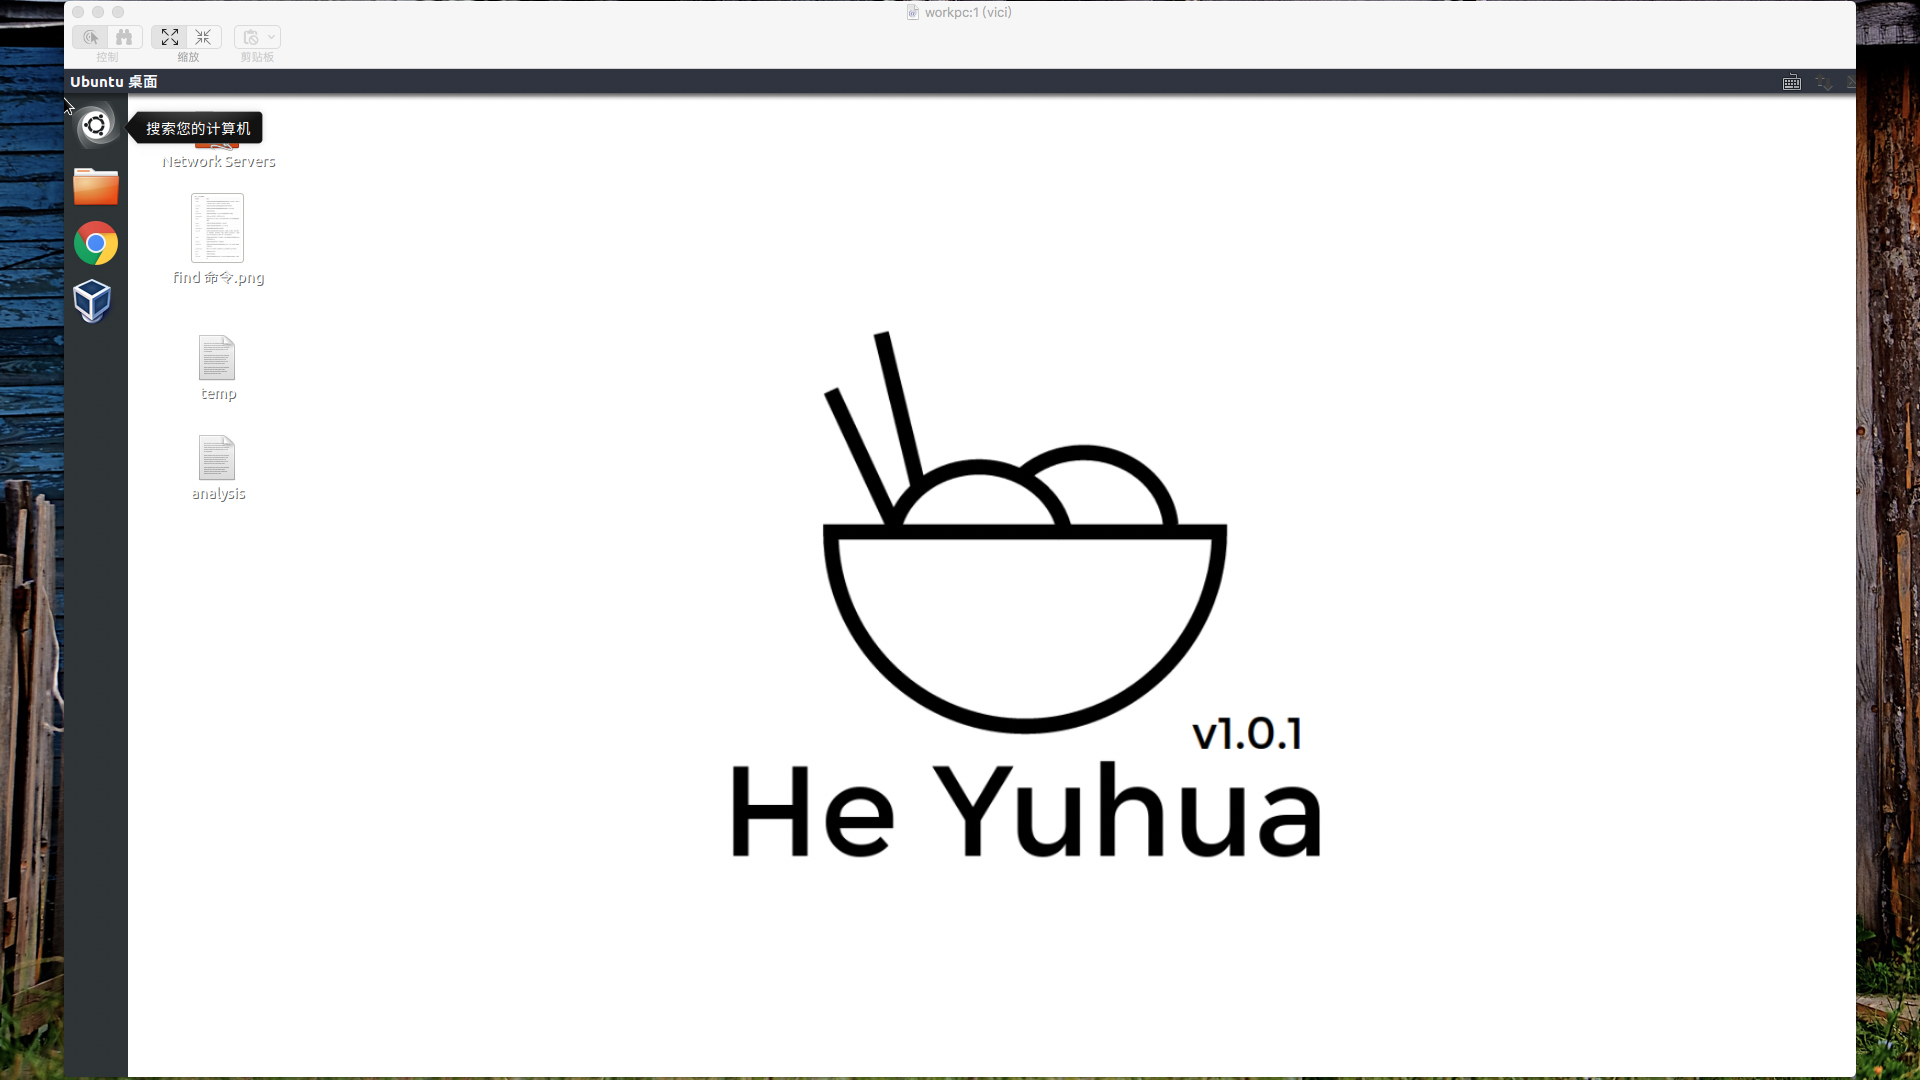
windows remote desktop beta, 超级好用。beta版支持分屏,文件拖拽。连ubuntu16.04 全色域 unity桌面环境 2k分辨率。
注意事项:
- 目前只在ubuntu16.04 LTS 版本测试过,服务器版本或其他开发版版本暂无解决方案。
- 此方法要求网络环境及其良好,如内网环境中;
- 要求工程机性能达到一定程度,否则会卡顿;
- 大部分内容搬运自 这里
1. 安装tigervnc
下面是大佬写好的install.sh 文件内容。 创建好文件后 直接
chmod +x install.sh & ./install.sh或者你也可以逐条复制粘贴。
 1
 2
 3
 4
 5
 6
 7
 8
 9
10
11
12
13
14
15
16
17
18
19
20
21
22
23
24
25
26
27
28
29
30
31
32
33
34
35
36
#!/bin/sh # 更新 repository sudo apt update -y # install git and devscript. sudo apt install -y git devscript # Remove vnc4server.(或者其它同类vncserver,一定要删除!!!) sudo apt remove -y vnc4server # Create working directory. mkdir tigervnc cd tigervnc # Download source code. git clone https://github.com/TigerVNC/tigervnc cd tigervnc/ # Avoid compiler error.(记得切换版本。胆子大的可以试试不切换,) git checkout ff872614b507d0aa8bfbd09ef41550390cfe658a # Prepare to build package. ln -s contrib/packages/deb/ubuntu-xenial/debian chmod a+x debian/rules sudo apt install -y -o 'apt::install-recommends=true' \ `dpkg-checkbuilddeps 2>&1 | \ sed -e 's/.*build dependencies://g' -e 's/([^)]*)//g'` # Build package. (大概一杯咖啡的时间) fakeroot debian/rules binary cd .. # Install package with resolving dependent package. sudo dpkg -i *.deb || (sudo apt-get -f install -y ; sudo dpkg -i *.deb || exit 1) cd ..2. 创建
~/.xession文件文件内容:
 1
 2
 3
 4
 5
 6
 7
 8
 9
10
11
12
/usr/lib/gnome-session/gnome-session-binary --session=ubuntu & /usr/lib/x86_64-linux-gnu/unity/unity-panel-service & /usr/lib/unity-settings-daemon/unity-settings-daemon & for indicator in /usr/lib/x86_64-linux-gnu/indicator-*; do basename=`basename ${indicator}` dirname=`dirname ${indicator}` service=${dirname}/${basename}/${basename}-service ${service} & done unity3. 添加
gnome-control-center如果显示文件已存在, 就可以跳过了。(比如说之前做过个性化设置什么的)
1$ sudo ln -s /usr/bin/unity-control-center /usr/bin/gnome-control-center4. 运行vncserver
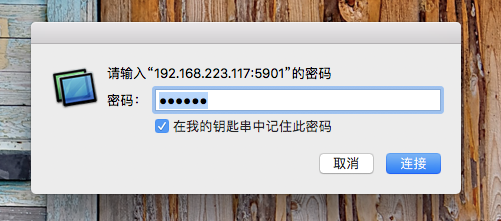
创建vnc密码:
1
2
3
4
$ vncpasswd Password: Verify: Would you like to enter a view-only password (y/n)? n运行vncserver,端口号为 5900 + 序号, 下面的端口就是: 5900 + 1 = 5901 同时还指定了分辨率为1920*1080
1
2
3
4
5
6
$ vncserver -geimetry 1920x1080 New 'ubuntu-16:1 (hiroom2)' desktop is ubuntu-16:1 Starting applications specified in /home/hiroom2/.vnc/xstartup Log file is /home/hiroom2/.vnc/ubuntu-16:1.log你也可以在~/vnc/startup 里设置分辨率。
5. mac连接
在 mac桌面环境下 使用快捷键
⌘(command)+ k呼出连接器 输入 你的vnc服务器vnc://ip:port连接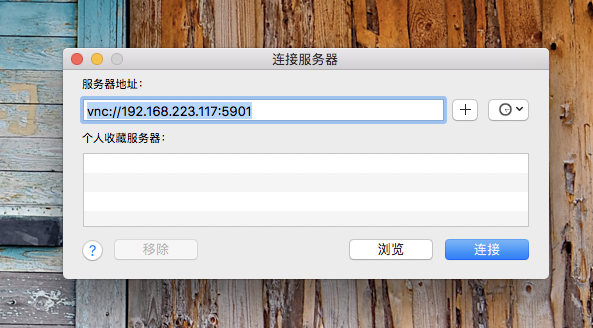
使用pycharm做远程开发
配置方面借鉴了 –> 那年八月的博客
杂项
- 使用 GNU commandTool替换默认版本
注意到这个事情是因为 默认的
grep太诡异。教程-> 传送门
- 代理的配置(不得不说的是今天 看到百度首页的title 居然是 我爱你中国 )
- 如果使用shadowshocks, 最好把端口改成1080 而不是默认的1086(因为之前做了一些配置文件云同步东东)
- proxifier 负责全局调度(google_photo_backup & bropbox & 不支持socks5的可以很轻松的搞定)
- github 什么的需要额外配置
git config --global http.proxy .... - 漏网之鱼用proxychains4